Getting started
The first sign-in
On a brand-new installation the first visit shows Create the owner account. Choose your own name, email and a password of at least 10 characters. Any signatures already on the server (from before accounts existed) become yours.
After that, every visit shows Sign in. There is no public sign-up: new people are invited by the owner (see Accounts and admins).
The editor at a glance
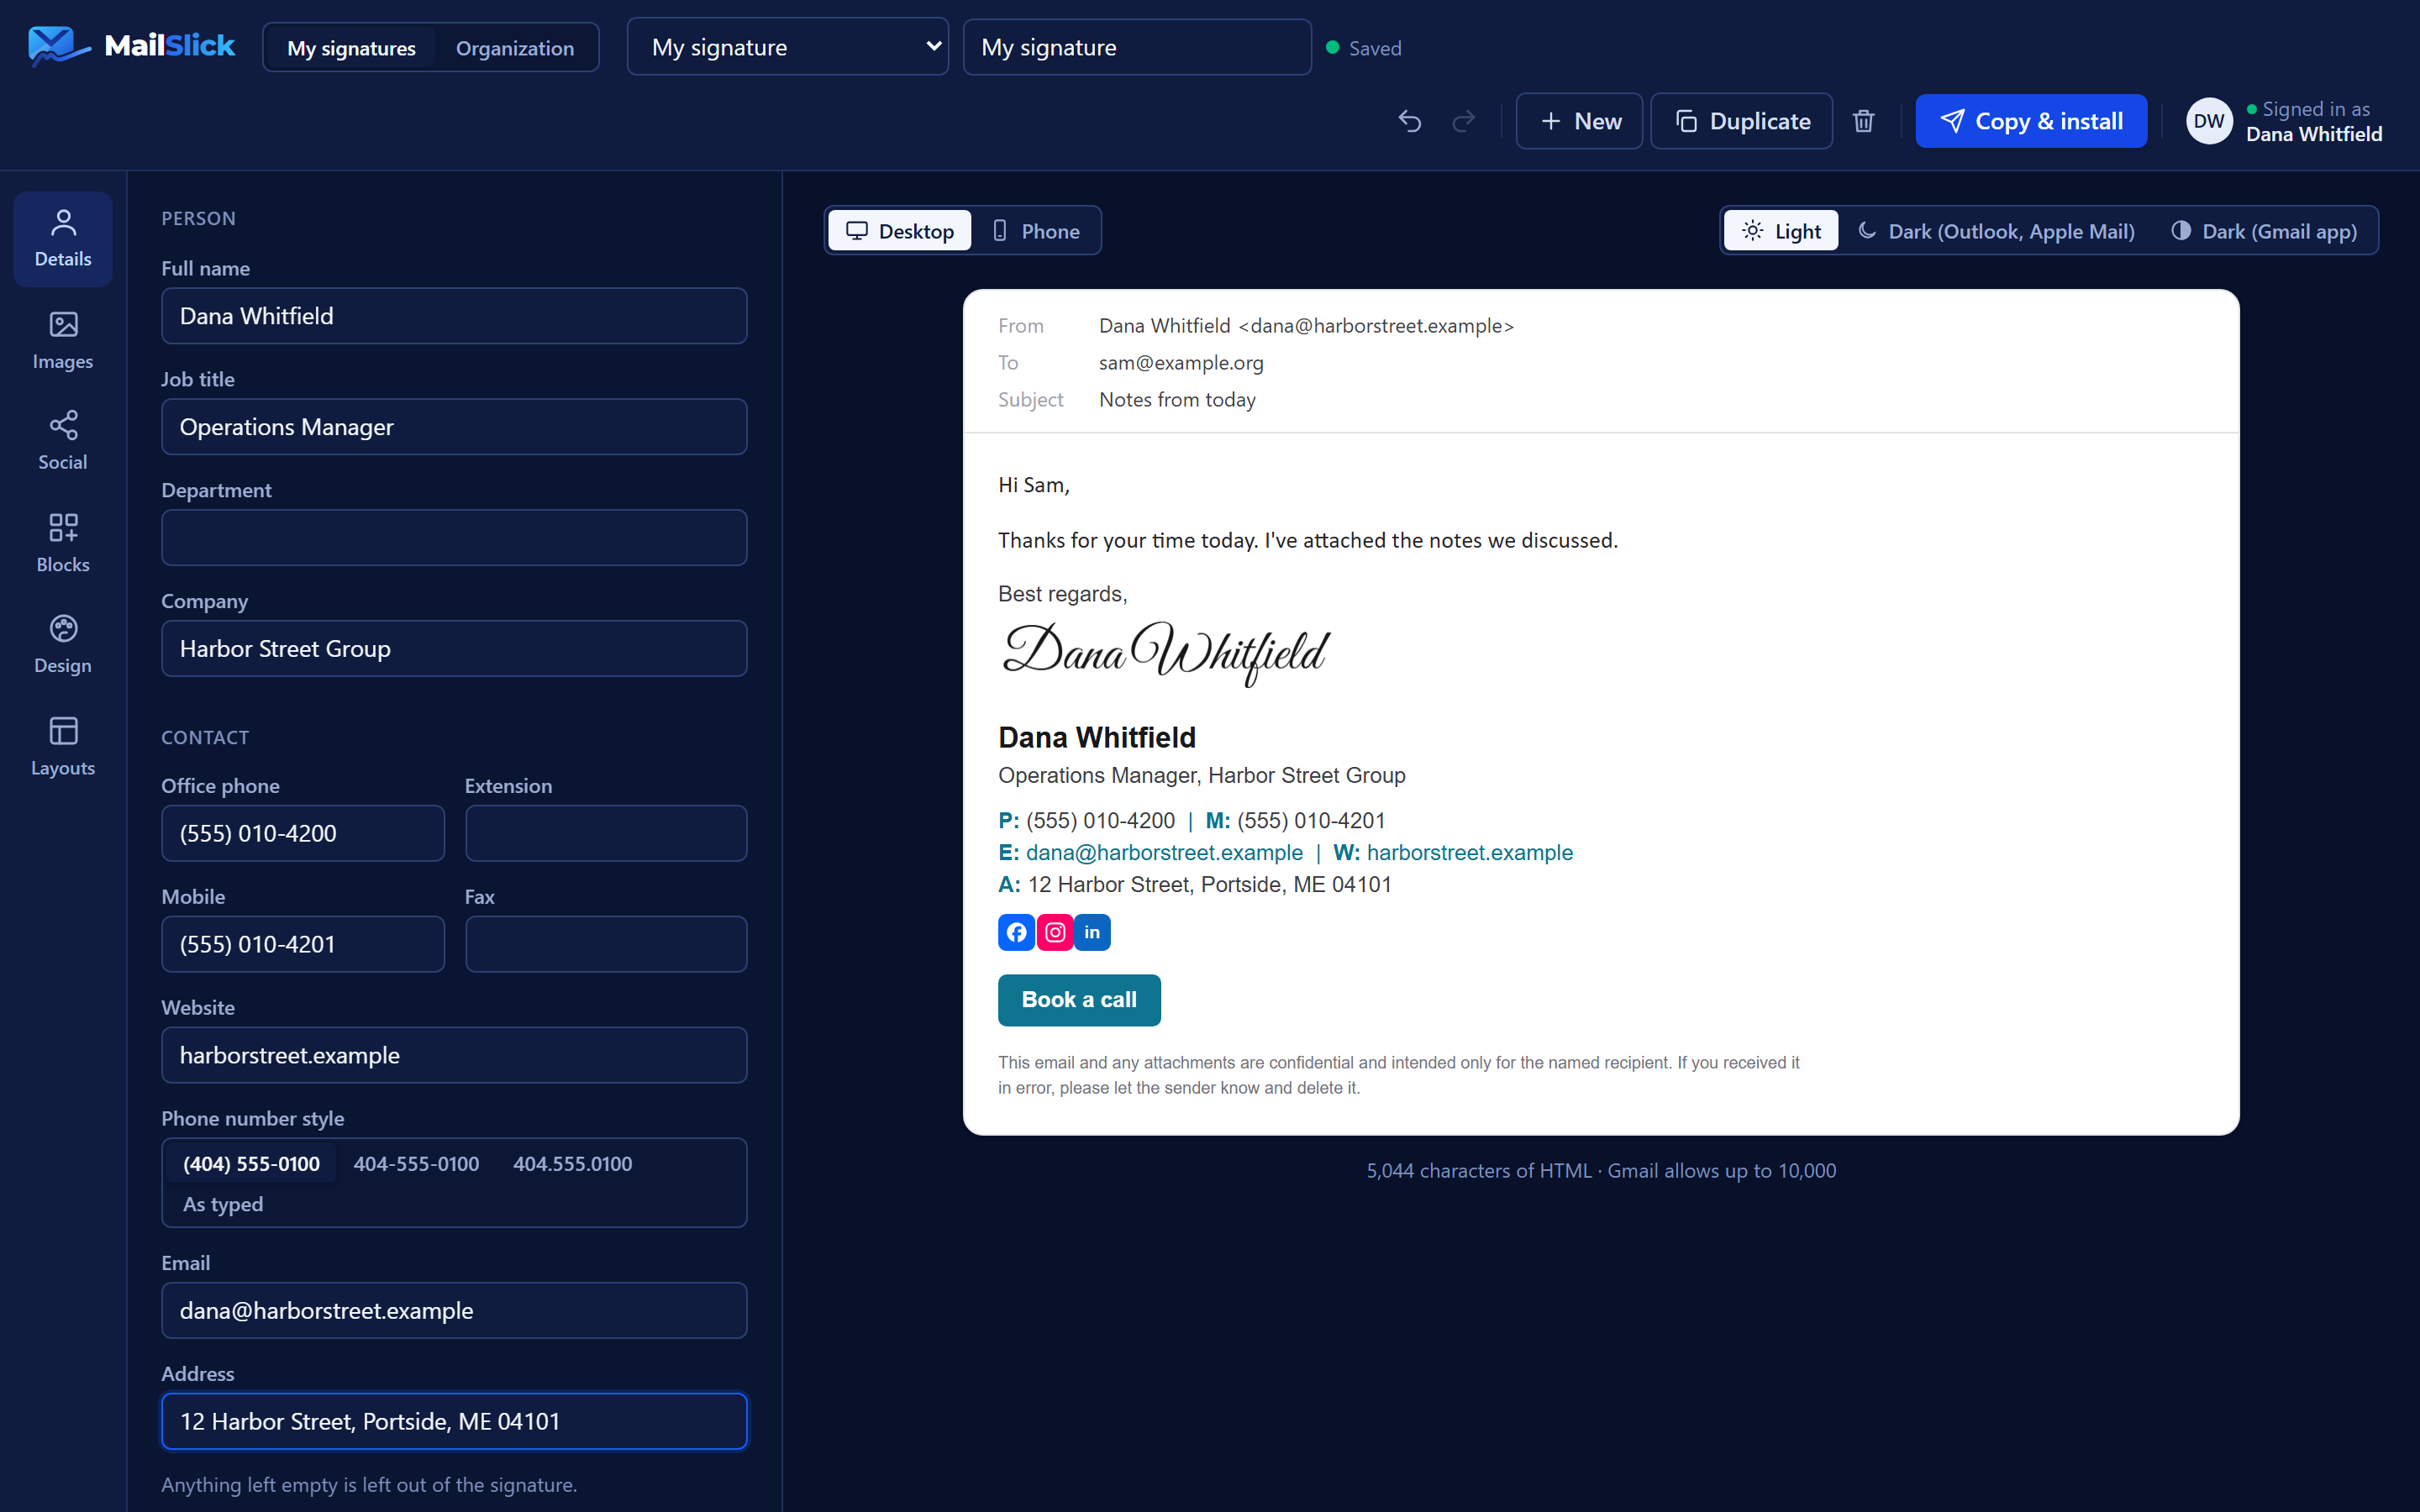
The editor with a sample signature: tabs on the left, the editing panel in the middle, the live preview on the right.
- The tabs down the left side switch the editing panel.
- The preview on the right shows the exact HTML that will be copied, inside a mock email. It updates as you type.
- The save light next to the signature's name shows the state: green Saved, amber Unsaved changes (a save is moments away), red Not saved: retrying. Saving is automatic; there is no Save button.
Building your first signature, in order
- Details: your name, job title, company, phone numbers, email, website and address. Anything you leave empty is simply left out of the signature.
- Images: a photo (cropped to a circle, rounded square or square) and a company logo.
- Social: the networks you want shown as icons.
- Blocks: the sign-off above the signature ("Best regards," with an optional handwritten name) and anything below it: a button, a banner, a row of badges, a quote, a disclaimer.
- Design: font, colors, size and spacing, dividers.
- Layouts: pick one of eight arrangements. Switching keeps everything you have entered.
- Copy & install: copy the finished signature and paste it into your mail app. See Installing a signature.
Your library
- New starts another signature from the example.
- Duplicate copies the current one, useful for a shorter reply signature.
- The drop-down at the top switches between your saved signatures; the box beside it renames the current one.
- Delete (the bin icon) removes the current signature after asking.
- Undo / Redo (the arrows, or Ctrl+Z / Ctrl+Y) step through your edits. Rapid edits such as dragging a slider count as one step.
Theme
The account menu has a Theme switch: Dark, Light or System. It is remembered in your browser. The email preview always keeps mail-app colors, whatever the editor's theme.